How to repair a standing Lamp
Did your standing lamp stop working? Don’t throw it away. Save yourself the expense of buying a new one and instead easily return your lamp back to functioning order.
Repairing your own lamp is an easy DIY project you can do at home. It gives you the power of solving your lighting issues independently, and opens a world of opportunity for making your own vintage, decretive or customized lamps.
Here is how you can use a lamp repair kit to fix your lamps at home in five easy to follow steps.
- Unplug your lamp and remove the turn knob.
First you need to safely turn off and unplug your lamp before you begin disassembling it, to prevent possible accidents or injury.
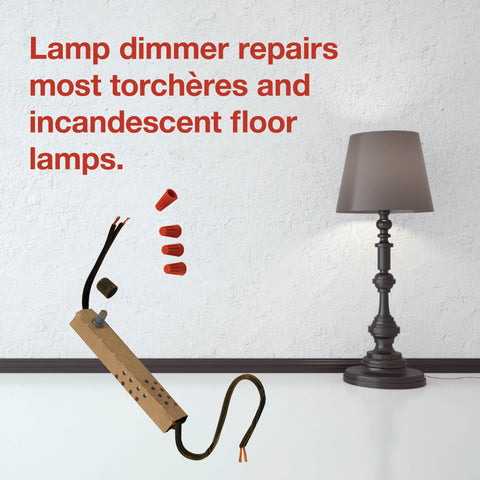
- Strip the wire
Using a wire cutter or pair of pliers disconnect the old unit by clipping the wires a few inches above the unit. Then strip the rubber insulation ¼” back on the clipped wire.

- Connect the wires
Using the orange wire nuts provided, attach the ribbed wires from the unit to the ribbed wires in lamp, and attach the smooth wires from the unit to the smooth wires in the lamp. (Caution: Check that you have the wires connected rib to rib and smooth to smooth)
- Install the switch
Slip the switch through the hole in lamp and secure it with a washer and nut.
- Put the turn knob back on, and you’re done!
Secure the turn knob back on the switch of your new unit, and you’re done! Congratulations, you have successfully fixed your own lamp.